Recipes
RECIPES
Each month I post a recipe on this blog, and then move it to this page so you can find them all in one place. Each recipe that goes in the back of my books is tested either by myself or a surrogate cook, usually my kind and patient sister. 1910s American country cooking is heavy, rich, and fattening, and I tend to overindulge in my test products. I was raised on this kind of food, and this is the way that my mother taught me to cook, so it isn’t foreign to me. However, I’ll let you in on a little secret, Dear Reader. This is not at all the way I cook at home, when I cook at all. We are very health-foody. I’m all over the organic, local, meatless style of cooking. So you will find that in addition to the country slow-cooking recipes, I also include fast and healthy recipes as well. I love to eat, and I love to eat different and interesting food. There is no particular requirement for the recipes I’ll be posting, as long as the dish is yummy and fun.
I will concentrate on American Appalacian-sytle food, because the kind of cooking that Alafair does is disappearing. That is one reason that I always put a special section of recipes and food lore in the back of each of the books. Just because I don’t generally eat like that any more doesn’t mean that I don’t have a certain nostalgia for it. When time comes to test and write about the recipes for the dishes that I mention in the books, I have to say that I really enjoy the heck out of myself.
Molasses Pie
From The Old Buzzard Had It Coming
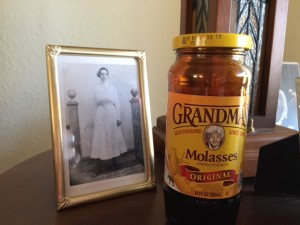
My grandmother Phoebe Lois Rankin Bourland could make a pie out of anything. That is her in the photo above, when she was seventeen years old and about to marry my grandfather in 1912. She is the inspiration for my character Phoebe, so have a good look and visualize that sweet creature next time you read about her. Below I have reproduced her recipe for a delicious pie made from molasses. This is a good winter pie, since it doesn’t call for anything out of season like fruit. It’s also a great addition to Thanksgiving dinner.
Filing for one pie:
2 cups of light molasses (be sure to use light and not dark molasses.)
1 cup sugar
3 eggs
1 tsp melted butter
juice of one lemon
ground nutmeg to taste
Beat all ingredients together in a large bowl. Pour into a partially baked pie shell and bake in a medium oven (350•F) until set (30-45 minutes. The sides should be set and the center a bit jiggly. The pie will set more as it cools.
Pecan Pie
Family recipe
October 2016
My great-grandfather had a pecan orchard on his farm in eastern Oklahoma (the very farm I modeled Alafair’s home after). Every fall my family would go out to the farm and spend an afternoon picking up pecans that had fallen from the trees. This usually happened late in the season. The little pecans were sweet and delicious, but hard as heck to crack. By the time I was old enough to remember how it was done, my grandmother had a little pecan-cracking device, which made the task much easier. Pecan pie has always been one of my favorites, and it’s fairly easy to make. However, I warn you, Dear Reader, that it is not low-cal. But then you only live once.
one nine-inch unbaked pie shell
Filling:
3 eggs
2/3 cup of sugar
1/3 cup of melted butter (if using unsalted butter, add 1/2 tsp salt. A pinch of salt gives the pie depth and keeps it from being too sweet.)
1 tsp. vanilla
1 cup corn syrup (I like dark corn syrup, but light works just as well.)
1 cup of pecan halves (or pieces)
Pre-heat the oven to 375•F. Beat the eggs, then stir in the rest of the filling ingredients until well-blended. Pour into the pie crust and bake 40 to 50 minutes, until set. The pecans will rise to the top.
Fried Green Tomatoes
From Hell With the Lid Blown Off
August 2016
Nothing is easier or tastier than summer’s ultimate side dish, fried green tomatoes. Cut green tomatoes into slices about half an inch thick. Dip each slice into flour, salt and pepper, or a beaten egg, then yellow cornmeal. Fry the slices slowly in a skillet in a little hot fat until they are browned to your satisfaction. Turn them over and brown on the other side. Drain on a paper towel. Until the latter part of the twentieth century, “hot fat” would have been just that; the melted fat left over in the skillet after cooking meat, which your grandma saved in a grease jar that she kept next to the stove. Sometime in the 1970s or ’80s, we got wise, and now when we say “hot fat”, we really mean “Hot non-hydrogenated vegetable oil.”
Peach Ice Cream
From The Drop Edge of Yonder
July 2016
4 or five large fresh peaches, peeled and pitted
1/2 cup sugar
3 beaten egg yolks
1/4 tsp. salt
1 tsp. vanilla
1 cup whole milk
2 cups heavy cream
Puree the peaches, which Alafair would have done by mashing the flesh of the fruit through a sieve with the back of a large wooden spoon. Sweeten the peaches with an additional 1/2 cup of sugar if they are not sweet enough for you.
Mix sugar, salt, milk, and egg yolks in a saucepan, cook over medium heat, stirring constantly, just until bubbles begin to appear around the edge of the pan. Cool to room temperature. Stir in the cream, vanilla, and peach puree.
Pour the ice cream mixture into the freezer can. Fill the can only two-thirds full, to allow for expansion as the ice cream freezes. Fit the can into the bucket, insert the dasher, and put the lid on the can, then attach the crank.
Fill the freezer tub one-third full of ice, then alternate the rock salt and remaining ice, filling the bucket to the top of the can. Use about four parts ice to one part salt. Turn the dasher slowly until the ice partially melts and makes a brine. Then crank rapidly until it is hard to turn the dasher. Remove the ice from around the top of the can and remove the dasher. Plug the hole in the lid and replace it on the can. Refill the bucket with ice and salt and leave the ice cream to “ripen” for several hours.
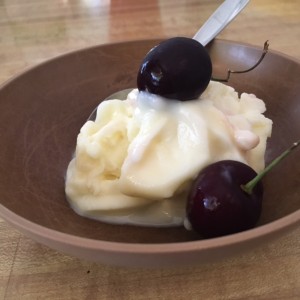
“Ripening” makes a firmer dessert. However, when the day is hot and a bunch of impatient kids are clamoring about, a bowl full of soft, semi-frozen cream that has to be gobbled up before it turns back into liquid is perfectly delicious.
Watermelon Pudding/Pie
June 2016
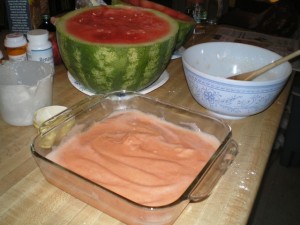
I am always experimenting with recipes. I do it mostly because I’m looking for something good to put in my books, but partly because I love that kind of thing. It is June, and nothing says summer in the South like watermelon. A few years ago, I saw a recipe in my local newspaper for a watermelon pie, and I just had to try it. The newspaper recipe calls for a graham cracker crust, which would be delicious, I think. But my husband can’t eat graham flour, so I just made the filling–basically a watermelon pudding. It was amazingly easy. The hardest parts were cutting and chunking the watermelon and cleaning up the mess. Otherwise, it took about twenty minutes to make. Here is the recipe as I did it:
2 1/2 cups watermelon flesh
2 tablespoons lemon juice
2 eggs
1/4 cup cornstarch
1/4 cup sugar
whipped cream
Puree the watermelon in a blender until completely smooth. (about 2 cups of juice) Strain the juice through a fine-mesh strainer into a saucepan and add the lemon juice. Bring the juice to a simmer over medium-high heat.
In a heat-safe bowl, whisk together eggs, cornstarch, and sugar until smooth. Slowly pour the hot juice into the egg mixture, whisking all the while. Then pour the mixture back into the saucepan and continue to cook, whisking until thickened. Pour the watermelon pudding into a pie pan (or even better, graham cracker pie crust), press a piece of plastic wrap directly onto the surface of the pudding and refrigerate until cold. Serve with whipped cream.
I don’t care how odd it looks, it’s delicious!
Grape Dumplings
Traditional Cherokee Recipe
May 2016
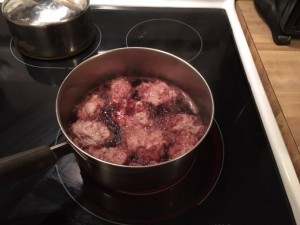
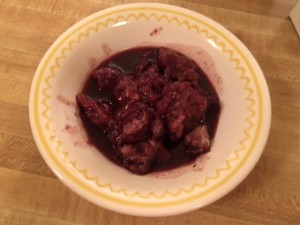
This is the recipe I used to make my dumplings. It is from a traditional Cherokee cookbook. Some recipes call for an egg, which makes the dumplings more noodle-like. I dropped my dough into the juice from a spoon rather than rolling and cutting. My dough was not as stiff as it should have been. Be sure to add a little more flour if your dough turns out too sticky. This is delicious with ice cream.
Grape Dumplings
1 cup flour
1 1/2 tsp baking powder
2 tsp sugar
1/4 tsp salt
1 tbsp shortening
1/2 cup grape juice
Mix flour, baking powder, sugar, salt and shortening. Add juice and mix into stiff dough. Roll dough very thin on floured board and cut into strips ½” wide (or roll dough in hands and break off pea-sized bits). Drop into boiling grape juice and cook for 10 – 12 minutes.
Some Cherokee cooks continue to make their grape dumplings by gathering and cooking wild grapes, or ‘possum grapes’ instead of grape juice. Here is the finished product, with juice:
Flapjacks (Flour Tortillas)
from The Wrong Hill to Die On
April 2016
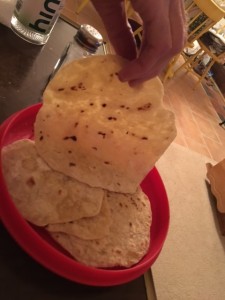
I used this in The Wrong Hill to Die On, but it is actually my mother-in-law’s recipe for flour tortillas. My mother-in-law’s first husband was of Mexican extraction, and her own mother-in-law taught her how to make this simple but delectable bread. My husband and his many siblings, who were not raised in a Latin culture, called them ‘flapjacks’, and it was one of their favorite things to eat with beans. The ‘flapjacks’ make fabulous scoops and wraps for anything you want to wrap them around.
Tortillas (Flapjacks)
3 cups white flour
2 tsp. baking powder
1 tsp. salt
4-6 Tbsp shortening or lard
about 1 1/4 cups warm water
Mix flour, baking powder, and salt together in a large bowl. Cut in the lard with a fork or mix in with your hands until mixture resembles coarse crumbs. Add warm water a little at a time until you have a soft dough, pliable but not sticky. Knead the dough for a few minutes until smooth. Let it rest in the bowl for ten or fifteen minutes. While the dough is resting, heat a large cast iron skillet over medium to medium-high heat.
Pull the dough apart into 10 or 12 balls and on a floured surface roll each ball into a flat, round disc about an eighth of an inch thick.*
Lay the tortilla in the hot, dry, skillet and cook until it is covered with brown speckles. This takes just a few seconds if the skillet is hot enough. Turn the tortilla over and brown the other side. Pile the finished tortillas one on top of the other on a plate and keep warm with a towel. Eat plain, fresh, and hot. Or smear with refried beans or fill with meat or cheese or what you will. Nothing like it.
_______________
* Alafair could roll her ‘flapjacks’ into a perfectly circular shape with three or four swipes of an entirely unremarkable kitchen rolling pin. No one knows how she managed to do this, since after four passes with the rolling pin ordinary mortals will end up with a tortilla that looks like an amoeba. She could also do this with pie crust. She was a rolling pin savant.
Fruit Cocktail Cake
Family Recipe
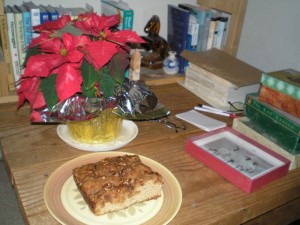
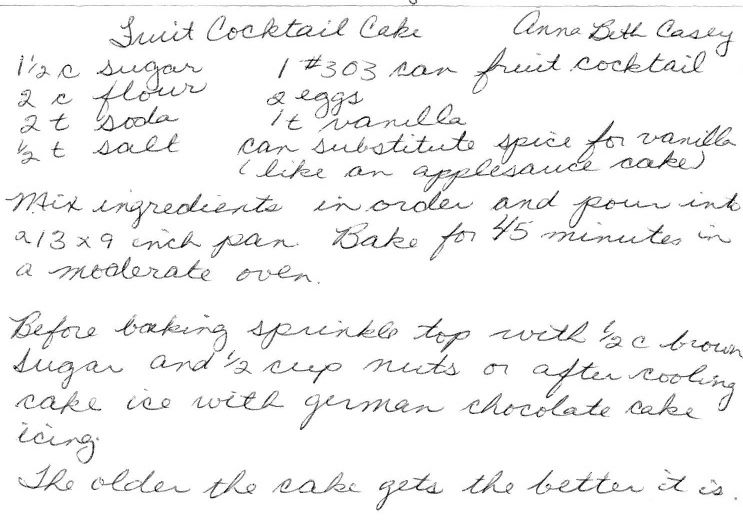
This recipe is Casey family legend. When I was a girl, my mother seldom made special deserts for a meal. Instead, she often made a sheet cake that sat out on the cabinet for several days, which we would all cut pieces from every time we passed. After my mother died, I asked my sister if she remembered how to do it, and she wrote it out on an index card and sent it to me. For your pleasure, Dear Reader, I upload the card in my sister’s own handwriting. I can’t use this exact recipe in the Alafair books, since she wouldn’t have had the same access to cans of fruit cocktail as did my mother. Even if Alafair could have bought canned fruit, she wouldn’t have. She canned her own fruit, durn it. I just returned a couple of days ago from the Left Coast Crime Mystery Conference, and used this recipe as part of the swag I gave away to attendees.
This cake is easy-peasy, and while it’s delicious right out of the oven, the older it gets, the more luscious and succulent it becomes. In fact, just thinking of it…Excuse me while I delicately dab saliva off my chin.
Chicken & Dumplings
from The Drop Edge of Yonder
I’m currently working on a book that takes place during the influenza epidemic of 1918, which means that for the recipe section I will be including lots of old-fashioned healing foods for invalids and sick people. This has made me think about the chicken and dumplings that my mother used to make–not nearly as often as I would have liked. By the time I was of an age, my mother was able to buy chicken already cleaned and cut up. But of course, Alafair would have had to start from scratch. That is, a live chicken and an axe. Or my grandma did it, a quick twist.
Wash a 4 or 5 lb. stewing chicken and cut it up, removing any excess fat. Put the chicken in a kettle, along with the giblets and neck, a couple of teaspoons of salt, a little pepper, and just enough water to cover. For extra flavor, you may add a sprig of parsley, a bay leaf, some celery leaves, a small sliced onion, and/or a sliced carrot. Bring to a boil, then reduce heat and simmer, covered, for 2 1/2 to 3 1/2 hours, until the chicken is fork-tender and practically falling off the bone.
Remove the chicken from the broth and pull the meat off the bones with a fork and cut into pieces. Discard the bones, skin, the bay leaf, and any other disgusting pieces of innards that you don’t want to eat, then return the chicken meat to the broth. Bring back to the boil.
Dumplings
1 1/2 cups flour
3/4 tsp. salt
2 tsp. baking powder
3 tbs. butter or shortening
3/4 cup milk
Mix flour, baking powder, and salt into bowl. Cut in the shortening with a fork or your fingers until the mixture looks like meal. Stir in the milk.
Drop the batter by the tablespoons-full into the simmering chicken broth and cook uncovered for 10 minutes. Then cover the pot and cook for another 10 minutes, until the dumplings are fluffy and done through.
Hoppin’ John
Family Recipe
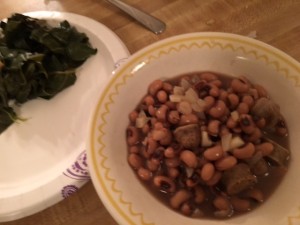
Hoppin’ John is a Southern dish that is traditionally served with greens on New Year’s Day in order to bring good luck and prosperity. Of course you don’t have to wait until January 1 to eat hoppin’ john. It’s delicious whenever you eat it. It’s good for you, too. I haven’t used the hoppin’ john recipe in any of the Alafair novels as of this writing, but I expect I will. It’s too yummy not to use.
I’m giving the scratch recipe, but there is no reason one can’t simply open a can of black-eyed peas and doctor it up with onion and garlic and bacon or ham hock. In fact, that’s what I did yesterday.
1 1/4 cups of dried black-eyed peas
4 cups of fresh water or broth
1 cup of chopped onion
3 cloves of minced garlic (I like mine garlicky)
1/4 tsp. cayenne (optional)
1 Tbsp. oil
ham hock or large chunk of fat back or bacon.
Soak the peas in water overnight. Drain, then cover with the fresh water or broth. Heat the oil in a large stock pot and brown the ham or bacon. Add the onion and garlic and cook for a couple of minutes, until the onion is translucent. Add the peas with their liquid. Bring to a boil, then reduce the heat to low and simmer for an hour, until the peas are tender and luscious. If needed, add more liquid as the peas cook.
Serve over rice, with a side of cooked greens (or mix rice and greens and peas all together). Best eaten with a buttery hunk of cornbread. For luck in the new year, add a coin to the pot just before serving. Whoever gets the coin will have a prosperous year. (Be sure and warn everyone to be on the lookout for the coin, unless you want to start the new year with a trip to the dentist.
Boiled Chocolate Oatmeal Cookies
Family Recipe
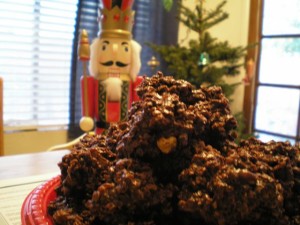
For December, I’m treating you to my late sister-in-law LaNell’s recipe for boiled chocolate oatmeal cookies. These are oh, so delicious, and very easy. I have this recipe in LaNell’s handwriting, and have lovingly pressed it into my personal cookbook. It would be a shame not to perk up your Christmas with these cookies.
1 stick butter
1/2 cup milk
2/3 cup cocoa powder
2 cups sugar
1/2 tsp salt
1 tsp vanilla
3 cups uncooked quick oats
1 cup chopped nuts
Combine first five ingredients in a saucepan and boil two minutes. Add 1 tsp vanilla. Remove from the fire and add 3 cups of uncooked one-minute oats. Add one cup of chopped nuts. Mix in well. Drop by teaspoons-full onto wax paper and let set. Yields about 40 cookies.
War Cake
From All Men Fear Me
Ten years ago, I was not more than ten pages into the first draft of the first book in this series, The Old Buzzard Had It Coming, when I realized that I was going to be writing a lot about food, and not just any food, but American farm food–heavy, caloric, abundant meals made almost exclusively from what you could grow or slaughter yourself. Because if like Alafair you live on a horse farm in Oklahoma in 1912, and you have ten kids, you’re always thinking about what’s for dinner.
It occurred to me even then that readers would probably be interested in the recipes for these old country dishes that were so common and everyday for my parents and grandparents, so from that very first Alafair novel I have included several recipes mentioned in each story. And not just the recipes themselves, but the food lore that goes along with them. For instance, there are specific ways to eat beans and cornbread, and everyone has her favorite. There are also very wrong ways to make, say, cornbread, if you intend to call yourself a bona fide Southerner.
In the latest Alafair novel, All Men Fear Me, saga of the Tucker family has moved forward to 1917. By now four of the girls are married, there are four grandchildren, the community has almost recovered from the devastating tornado of the previous summer, and everything would be hunky-dory if it were not for the fact that the United States has recently declared war on Germany and Alafair didn’t have two well-grown sons.
The book is not about the life of a soldier, though, or what is going on in Europe, or trench warfare. It is about the American home front. My grandparents were all in their early twenties at the time, and as much as they all loved to talk and tell tales, none of them told me anything about life in the middle of America during World War I. So for most of my life, I’ve had the mistaken impression that the war didn’t have much impact on daily life over here.
Oh, there was impact galore, Dear Reader. But today I’m restricting myself to the impact on dinner. The United States Food Administration, headed at the time by a young man named Herbert Hoover, was charged with making sure that all American housewives were doing their part for the war effort. “Our problem,” said the USFA, “is to feed our Allies by sending them as much food as we can of the most concentrated nutritive value in the least shipping space. These foods are wheat, beef, pork, dairy products, and sugar. Our solution is to eat less of these…and to waste less of all foods.”
So every housewife was encouraged to use as little of the aforementioned foodstuffs as possible. There are several surviving war cookbooks that the USFA distributed to show women how make meals for their families without using wheat, or meat, or sugar, and these are the recipes that I’ve been trying out on my long-suffering friends. To tell the truth, some of them are pretty good.
Recently I attended a chapter meeting of the Historical Novel Society and took a big plate of War Cake for their scrutiny and critique. I got the recipe from a 1918 USFA publication called War Economy in Food. Now, I’ve tested out many old recipes in the course of writing this series, and more than once the results have been less than satisfactory. Our modern tastes are different from our ancestors’, and sometimes the old dishes are so heavy and rich that a bite or two is all we can take. Of course we don’t plow the back forty after dinner like Grandpa did.
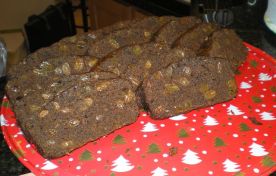
But the reviews of War Cake were very good, which surprised me a bit because this cake has no wheat, no sugar, and no eggs. It’s dense and moist and even though it has no ginger, it reminds me of gingerbread, or Boston brown bread. Here’s the recipe directly from the booklet. It’s easy to make and delicious. But I warn you, Dear Reader. Low in calories it is not.
War Cake
1 cup molasses
1 cup corn syrup
1-1/2 cup water
1 package raisins (exact quantity according to preference)
2 TB fat (vegetable oil)
1 tsp salt
1 tsp cinnamon
1/2 tsp cloves
1/2 tsp nutmeg
3 cups rye flour
1/2 tsp soda
2 tsp baking powder
Boil together for 5 minutes the first nine ingredients. Cool, add the sifted dry ingredients and bake in two loaves for 45 minutes in a moderate oven. (I baked it at 350º F. – Donis)
I like to use golden raisins because they are tender and look nice. I use a 1/2 pound package from Trader Joe’s. The corn syrup I’ve used is plain old white Karo, but I’ve also used maple syrup (which is delicious), agave syrup, honey, and a combination thereof. It’s all good.
Buttermilk Biscuits
From The Old Buzzard Had It Coming
In days before farm cooks bought sliced bread and toasted them in their toasters, the breakfast bread was usually biscuits. If you make biscuits every morning of your life, you get very good at it and it doesn’t take but a few minutes to throw together a batch. They cook quickly, and by the time you’ve fried up the eggs and bacon and made the gravy, you have delicious hot fluffy bread ready to pile up on a platter and set before your ravenous crew.
There’s nothing better than a biscuit with butter melting all over it, but biscuits and jam are hard to beat, as well. But if you want a sublime experience, open your steaming biscuit, put a glop of butter on each half, and drizzle on a couple of tablespoons of sorghum or honey. Don’t mix the syrup with the butter. Just let the butter melt and the sorghum/honey (or maple syrup) will meld into it. Believe me, it’s a thing you should definitely try.
Buttermilk Biscuits
2 cups flour
1/2 tsp salt
4 tsp baking powder
5 tbs shortening (lard, butter, or vegetable shortening)
1 cup buttermilk
Sift flour, salt, and baking powder together. Cut in the shortening with a fork (or fingers) until the mix resembles coarse crumbs. Add buttermilk all at once and stir until the dough follows the fork around the bowl.
Turn the dough onto a board and knead for 30 seconds. Don’t knead too much or the biscuits will be tough.. Roll out or pat out the dough 1/2 inch thick.
Dip a drinking glass, mouth-side-down, about an inch into the flour sack. Cut out the biscuits with the floured mouth of the drinking glass. Press the glass down firmly on the dough and give it a smart twist. Lift the glass, and the biscuit will come up with it. Shake the biscuits loose into your hand and place them on an ungreased packing sheet an inch or two apart.
When you’ve cut out as many biscuits as you can, ball up the dough and roll it out again. When there isn’t enough dough remaining to cut out any more whole biscuits, shape the remainder with our hands into a mini-biscuit and stick it in some likely corner of the baking sheet. This is the “pony”. The pony goes to the youngest child.
Bake on an ungreased baking sheet in a hot oven (450 degrees) until brown on top. (12 to 15 minutes).
Makes 12-14 large biscuits.
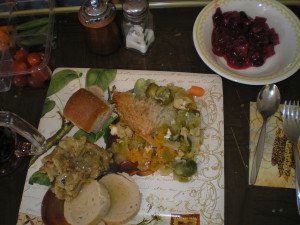
A Thanksgiving Day Menu
Old-fashioned Roast Turkey with Cornbread Dressing
Mashed Potato Puffs
Creamed Onions
Greens with Cornmeal Dumplings
Impossible Pumpin Pie
Chess Pie
ROAST TURKEY AND CORNBREAD DRESSING
Once upon a time it took some skill and education to know the proper way of roasting a turkey. Now all you have to do is know how to thaw a gigantic bird that has already been killed, plucked and cleaned for you. They even put the giblets into a handy little packet, so its easy to either make giblet gravy or throw the nasty things away without having to touch them. You don’t even have to be able to tell when the bird is done. Just watch for a thingy to pop up out of the breast.
The following directions for making roast turkey and dressing are old fashioned in the extreme. Because of the danger of salmonella, it is no longer recommended that the dressing be stuffed inside the turkey and cooked. But when I was growing up that was the only way to do it. Old-time cooks were entirely aware of the dangers of underdone meats, so housewives typically cooked the heck out of meat, especially poultry. My grandmother Casey cooked the stuffed turkey in a giant covered roasting pan for hours and hours, until the bird literally fell apart. She’d bring the whole pan to the table and and take off the lid to expose a turkey skeleton surrounded by a steaming, juicy, delectable conglomeration of cornbread stuffing and turkey meat.
It was delicious.
But how do you cook a turkey for so long while keeping it from coming out dry and desiccated?
Here is how my grandmothers did it:
TURKEY
Rub the turkey all over with butter and sprinkle with salt and pepper and a little flour. In fact, I once saw my grandmother loosen the skin over the breast and stuff butter under the skin as well as on top. Put the bird on the dripping rack in the pan with more pork or bacon and about a pint of hot water at the bottom. (Putting water in with the bird isn’t done any more, but the turkeys we eat now are much fatter they were in the early part of the last century.) Cook a twelve to fifteen pound bird in a hot oven for three or four hours, basting it every half-hour or so with the juices at the bottom of the pan. When the turkey is beginning to brown, pin a piece of buttered white paper over the breast. This keeps the breast from browning too much, and keeps it moist. You can also use a clean dishtowel dipped in melted butter and draped over the breast. When the breast is pierced with a fork and the juices run perfectly clear, and you can easily move the drumstick back and forth, the turkey is done. The bird should be allowed to sit for fifteen or twenty minutes before carving.
CORNBREAD DRESSING
Crumble a batch of cornbread into small chunks to make about 5 or 6 cups.
1 cup of chopped celery stalks and leaves
1/2 cup of chopped onion
1 cup of melted butter
2 tsp salt
2 tsp dried sage or crushed fresh sage
1 beaten egg (optional)
Cook the celery and onion in butter until tender. Stir in about a third of the cornbread cubes and pour into a deep bowl. Add the remaining ingredients and toss it with a big spoon or your fingers to mix well and aerate. This is a basic recipe. You can add anything to the dressing that appeals to you—sausage, apples, hazelnuts or chestnuts (my favorite), hard boiled eggs, oysters, parsley.
Stuff the turkey loosely. The dressing will expand as it cooks. Stuff the bird just before roasting, not ahead of time. Remove the dressing from the turkey as soon as possible after taking it out of the oven.
MASHED POTATO PUFFS
(From The Sky Took Him)
This is a lovely side dish, and easy to make, especially if you have leftover mashed potatoes.
Shape hot mashed potatoes into egg-sized balls and place them on a buttered cookie sheet. Brush with beaten egg and brown in a 400º oven for 10 or 15 minutes.
CREAMED ONIONS
(From Hell With the Lid Blown Off)
If you’re into onions, this is one of the most delectable side dishes ever conceived.
Here is the original recipe as handed down in the family:
Boil the onions until tender, then pour off the water and add a teacup full of milk, a piece of butter the size of an egg, pepper and salt. Stir in a heaping tablespoon of flour until it is creamy, then let it all boil up once and serve it hot in a nice dish.
Here is the recipe interpreted for those of us who don’t know exactly what we’re doing:
3 medium onions or half a dozen small onions (or a couple of handfuls of pearl onions)
3 tablespoons of butter
2 tablespoons of flour
1/4 tsp salt
pepper to taste
1 1/3 cups of milk
1 cup of shredded cheese, if desired.
If you are using very small onions, cut off the top and bottom and remove the first layer of skin. If you are using large onions, peel and quarter them. Put the onions in cold salted water to cover, bring to a boil, and boil until almost tender. Length of boiling time depends on size. Usually about ten minutes for small onions. They will start to look opaque. You can stick a sharp knife into one to see if they’re done. Drain off the water. In a saucepan, melt the butter, blend in flour, salt and pepper, and stir until smooth. Add the milk all at once and stir until thickened and bubbling. If you desire, you can add about a cup of shredded cheese to the roux right at the end and stir until blended. Stir in the drained onions and heat through.
GREENS WITH CORNMEAL DUMPLINGS
(From The Drop Edge of Yonder)
GREENS
This a very old fashioned way to cook greens. Any kind of greens can be used for this delectable dish, but turnip, collards, chard, or mustard are particularly good. Before cooking, wash the greens thoroughly in cool water to remove dirt and sand. Cut off any roots and damaged or yellowing parts. Rip the green off the stalks by hand and tear into strips. If you are using turnip or mustard greens, which can be bitter, blanch them first for ten minutes or so in a couple of cups of water and discard the blanching water.
1/4 lb. of fatback or salt pork (or bacon)
2 lb. of torn greens
2 1/2 quarts of water
Bring the water to a boil in a large pot. Add the fatback or salt pork, green and salt. Reduce the heat and simmer, covered for two hours. Remove the meat and discard. Dip out one cup of the broth (pot liquor) to make dumplings.
DUMPLINGS
1 1/2 cups cornmeal
1/2 cup flour
1 tsp baking powder
1/2 tsp salt
1 tsp sugar
1 tsp. salt
1 beaten egg
1 cup pot liquor
3 tbs. melted butter
Thoroughly combine the cormeal, flour, baking powder, sugar, and salt in a mixing bowl. Stir in the melted butter and one cup of pot liquor. Stir in the beaten egg. Spoon the batter by rounded tablespoonfuls into the simmering greens. Cover and simmer thirty minutes, or until the dumplings are cooked through. To serve, ladle soup, greens, dumplings and all into bowls.
CHESS PIE
(From Hornswoggled)
The chess pie that one finds in restaurants these days often resembles a lemon custard. Alafair’s chess pie was plain, gritty, straightforward, and inexplicably delicious.
1 cup sugar
3 heaping tbs. cornmeal
1 egg
1/2 cup of unsalted butter
1/2 cup milk
1 tsp vanilla
pinch of salt
Mix sugar and cornmeal. Add beaten egg and butter and mix well. Add milk and vanilla. Pour into uncooked pie shell. Bake slowly at 300º until firm. (about 50 minutes. Ovens vary.)
IMPOSSIBLE PUMPKIN PIE
(Family recipe)
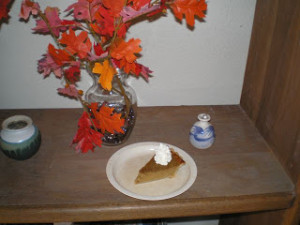
The following recipe is for the easiest and most amazing pumpkin pie ever made. This is my mother’s recipe, and I’m presenting it here exactly as she wrote it down.
3/4 cup sugar
2 eggs
1/2 cup biscuit mix (such as Bisquick)
1 can (16 oz) pumpkin
2 tsp. butter
2 1/2 tsp. pumpkin pie spice
1 can (13 oz.) evaporated milk
2 tsp. vanilla
Heat oven to 350 degrees. Grease 9 inch pie pan. Beat all ingredients until smooth. Pour into pan. Bake until knife inserted in center comes out clean, 50-55 minutes.
(No, you don’t make a crust. The pie will make its own crust.)


More Places to Go
Donis on Facebook
Type M for Murder